On any website we visit, we’re stuck in a net of security measures keeping us from doing whatever we want. Bug bounty programs give us a unique opportunity to attempt to slip through the tiny holes in that net. However, whilst being focused on fine-grained hunting, we can often lose sight of the bigger picture.
This week, we’re going to discover how Aquatone can help us with that. Are you ready to take a deep dive into this amazing tool?
Aquatone is a tool that allows the inspection of websites across a large number of hosts in a visually pleasing way. It is convenient for quickly gaining an overview of an HTTP-based attack surface.
There are a lot of tools out there that will give us a list of subdomains such as Amass, GoBuster, Sublist3r, Fierce, and Subfinder. These lists are amazing and preferably, we would want to go through each target in a very fine-grained manner, but sadly that often isn’t possible. We therefore quickly need to be able to group these endpoints and find the ones that look the most promising to us.
We’re in luck! That’s exactly what Aquatone can offer us. It will take our targets, quickly scan popular ports used by HTTP services, and take a screenshot of the resolved webpage. Following, it will give us a nice overview that allows us to view the targets in a list or in a graph view. We can look at which pages are identical and which aren’t. We can explore the headers returned for each endpoint and much more.
Quick glance of the Aquatone report
Want to try out the tool straight away? Hold your (sea)horses, we first need to install the tool. Luckily, it has been made very straightforward. Let’s get going!
Install Google Chrome or Chromium as a browser. This is being used in a headless way to take screenshots of the pages.
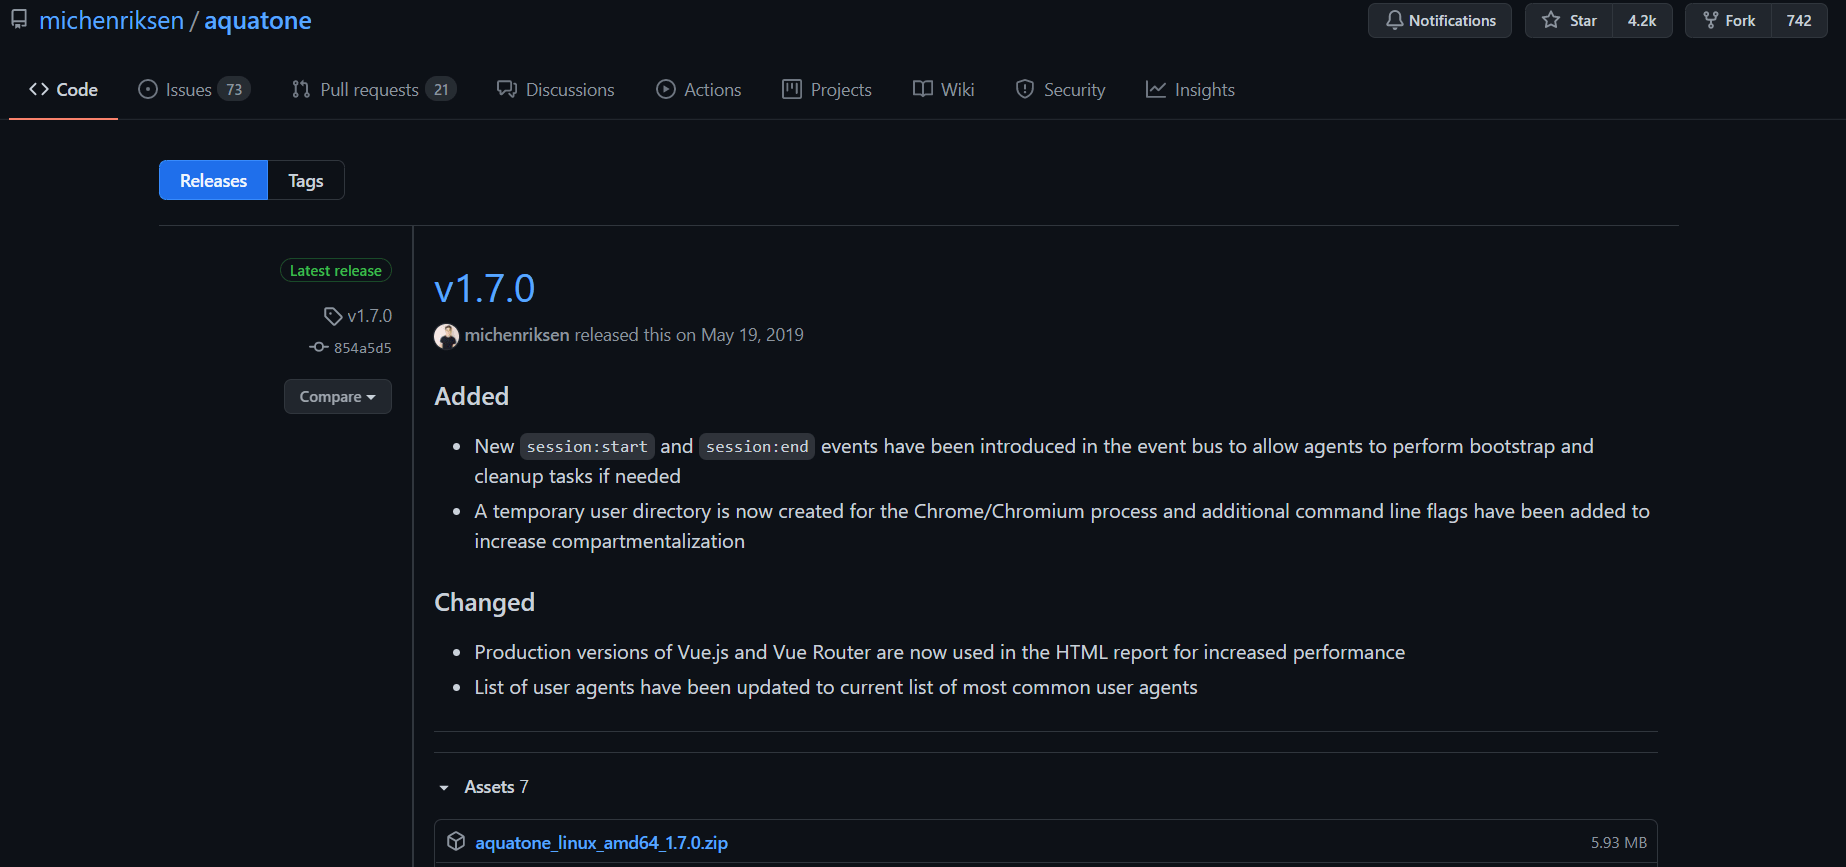
Download the latest release of Aquatone from here: https://github.com/michenriksen/aquatone/releases
Unzip the file.
You now have the aquatone binary on your filesystem. Enjoy!
Learning by reading the documentation is great, but what better way to discover a tool’s power than by actually using it?
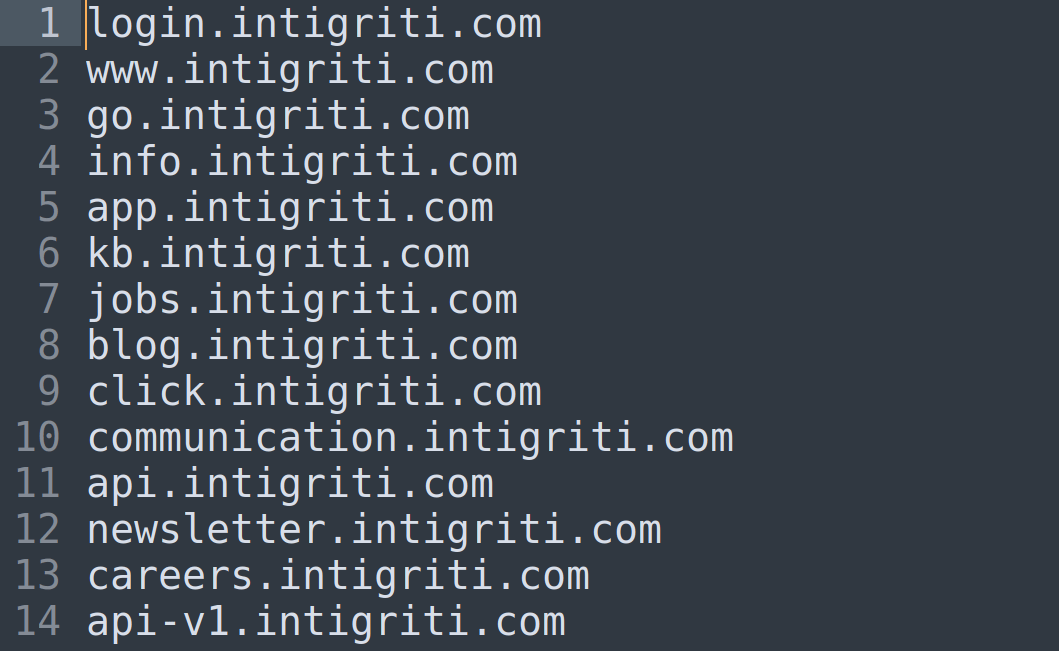
First things first, what do we need to start playing around with Aquatone? Well, as detailed earlier, we’re going to need a list of targets to scan and visualize.
The image on the left shows the list of targets we used, but note that you don’t need to give it structured data. Aquatone will match patterns in your input and extract URLs, domains, and IPs that way. It is perfect for when you’ve used other tools to do the reconnaissance and then pipe the results into Aquatone for viewing and assessing the found endpoints.
Input? Done! Time to run Aquatone! Pipe the input into the Aquatone binary and you’re good to go.
cat hosts.txt | sudo /opt/aquatone/aquatone
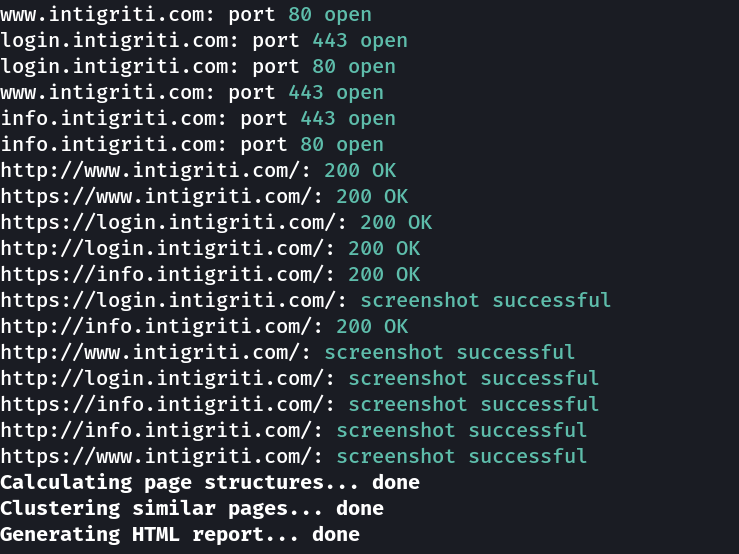
The magic starts happening. We firstly see that it starts to perform some simple portscans on the targets. The ports it scans can be defined by arguments. More on that later. Afterward, it will take a look at the HTTP responses and see if we got a 200, 404, 500, or any other status code back. Lastly, it will take a screenshot of the rendered response.
That’s it. When Aquatone is done with all that, you still get a quick laydown of the number of requests sent and such, but now you’re done. Your report has been created!
Before we get into looking at and analyzing the report, let’s take a quick glance at some of the command-line options we can supply to the Aquatone binary.
A lot of the options are very self-explanatory. These include -debug, -proxy, -http-timeout, -scan-timeout, -screenshot-timeout, -silent, -out, -threads and -version.
Others allow you to fully personalize the output you receive. The -resolution option allows you to supply the resolution of the screenshots where the default is 1440,900. The -save-body parameter gives you the opportunity to save the response bodies to files and the -template-path parameter allows you to supply your own template for the report, if you wish to get right up close and personal with it!
Then there are some more options for you to play around with. Firstly, let’s talk about -ports. This option allows you to choose which ports will be scanned. You can supply a comma-separated list or one of the supported aliases (small, medium, large, xlarge). For more information on all of these, please visit the repository here. Secondly, the -nmap option should be used if you’re using input from either nmap or Masscan. Lastly, the -session option allows you to load Aquatone session files and generate HTML reports on those.
To conclude, there are many options and ways for you to make Aquatone your own. Take a look around and see what you need to do to integrate the tool into your workflow.
To look at the results, open the generated aquatone_report.html file in your favourite browser. My favourite way of doing it is by using a Python web server (python3 -m http.server 80).
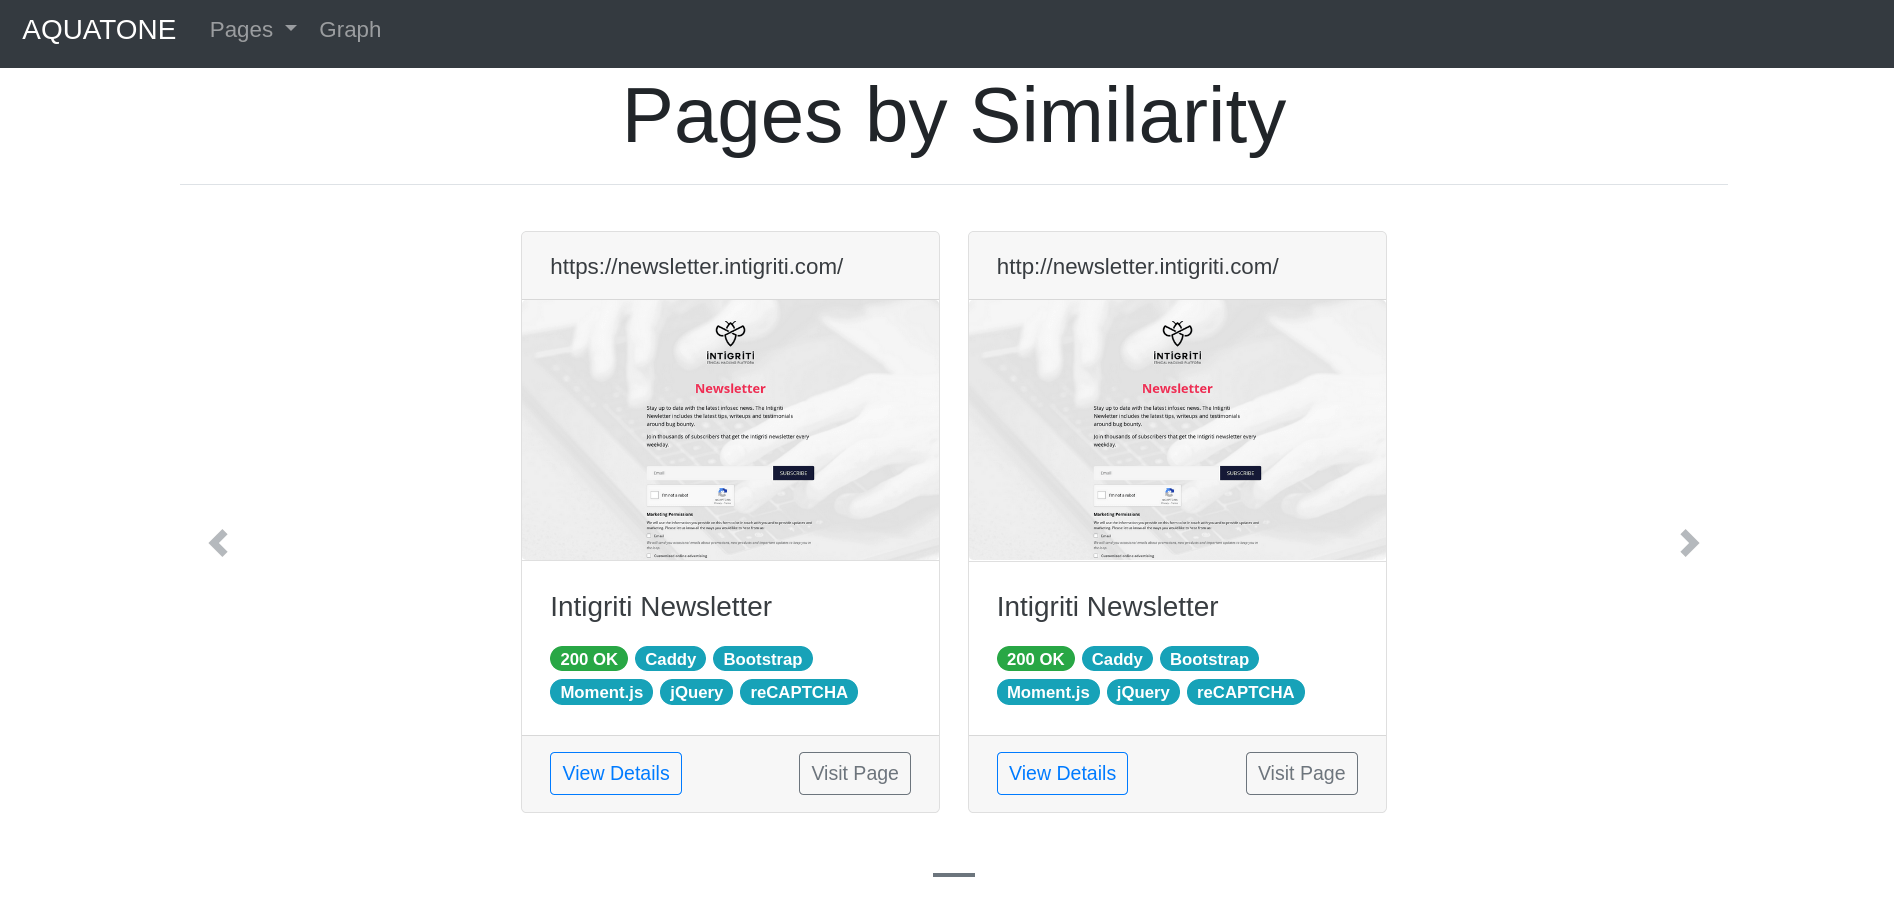
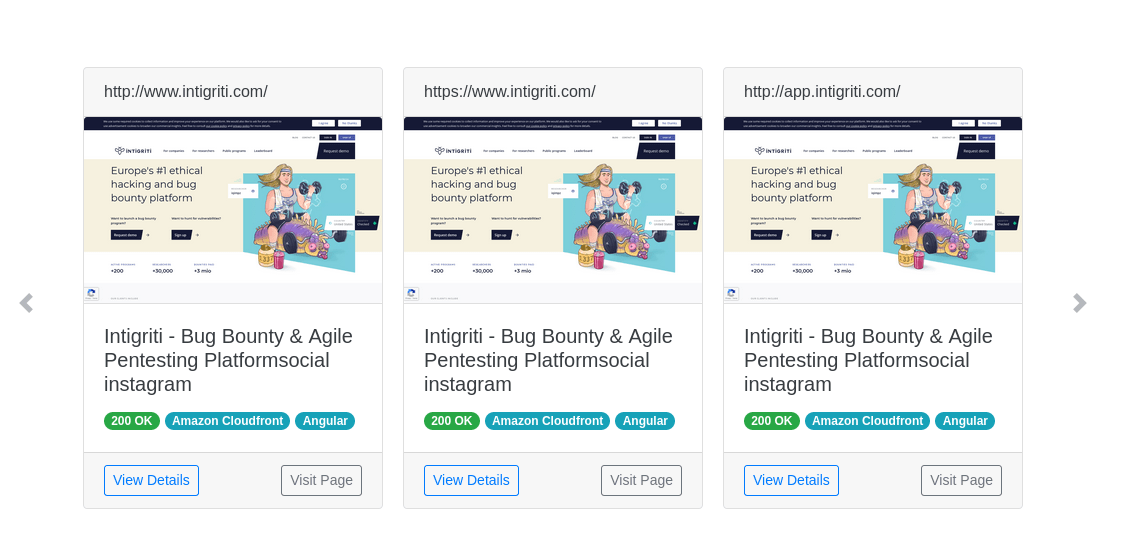
On the first page, you see, sorts different pages by similarity. This view is incredibly useful to quickly see which targets host the same files, limiting the number of targets you may need to hunt on. In the screenshot on the left, you see how it grouped app.intigriti.com and www.intigriti.com because they are on the same page. Each block detailing an endpoint also gives you a quick view of the screenshot as well as some extra information such as the technologies being used. See that in this case, it detects that Angular is being used. You can click the View details button to get a closer look at the headers and responses sent by the server.
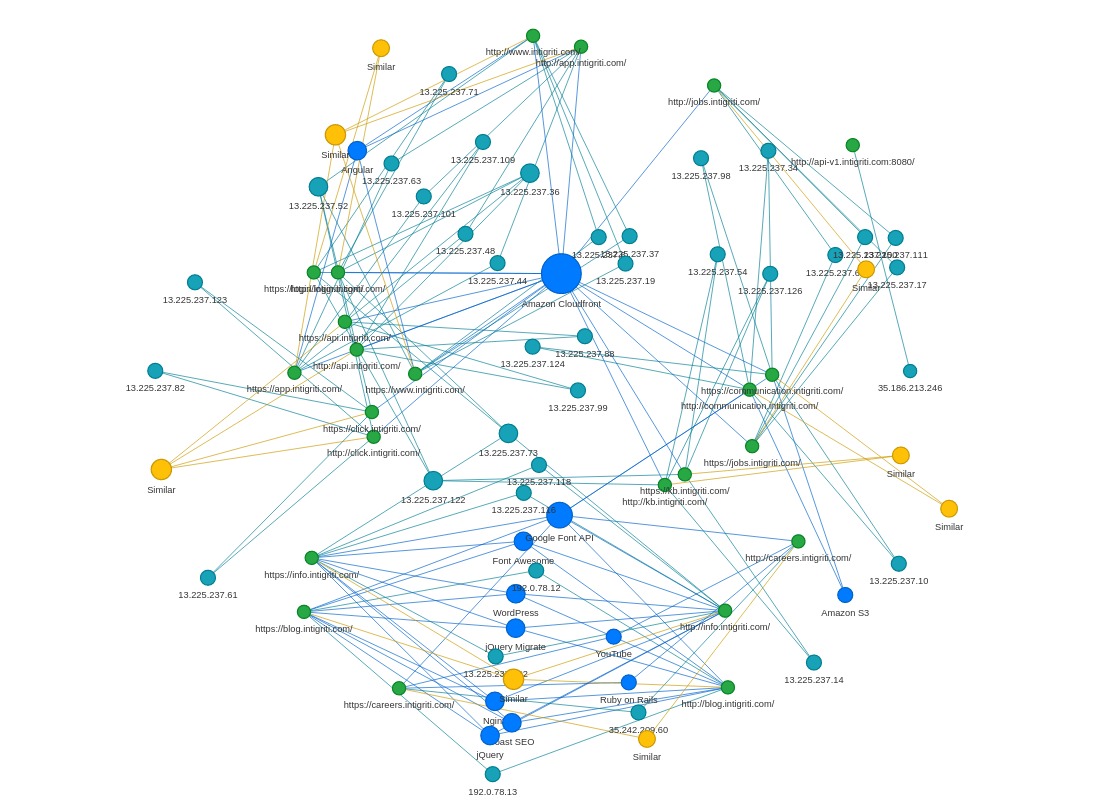
Additionally, we can also take a look at a graph linking all the endpoints together. This way, we can easily see which endpoints are using Angular, Nginx, or any other technology. Furthermore, we can see which IP addresses correspond to which targets and more. Use this graph to explore the HTTP attack surface of your targets.
As a bug bounty expert, you need to look for tiny mistakes in huge internet spaces. Losing track of the bigger picture could potentially cause you to miss out on a huge bounty, so I suggest always having this graph in the back of your mind, just to get an overview of what you are hunting on, what is similar to it, and where you could go next.
Today, we took a look at Aquatone, the one-stop tool for organizing your targets. With its easy way of looking at them, you’ll never be in a place where you don’t know where to start again. Boot up your machine and get hunting! Millions of unclaimed bounties are awaiting you!
If you would like to recommend a tool for us to cover next week, then be sure to let us know down below. Also be sure to check out all the previous Hacker Tools articles, such as the last one on CyberChef.
Did you know that there is a video accompanying this article?